What is a lighting layout? Your guide to outdoor LED design
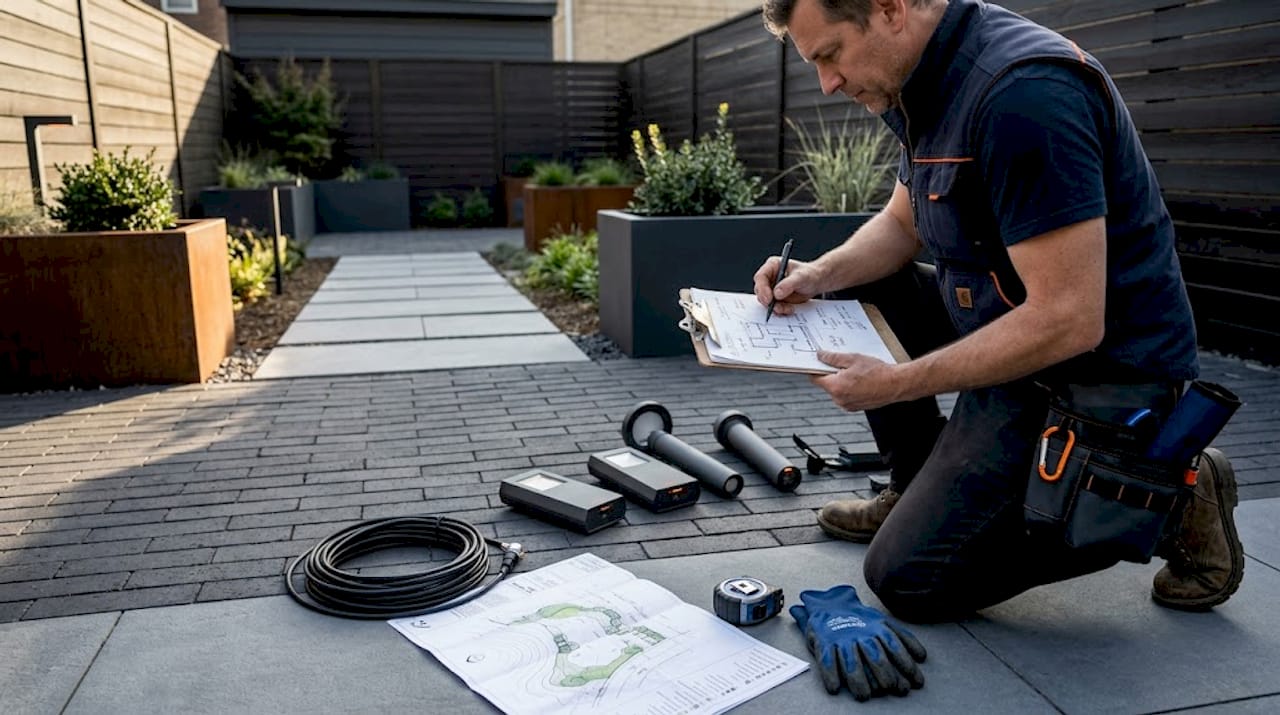
Most homeowners assume outdoor lighting is just a matter of buying fixtures and spacing them out along a path or roofline. The truth is that approach almost always produces disappointing results: dark corners, glare in the wrong spots, and a yard that looks nothing like the inspiration photos you had in mind. A lighting layout is an organized plan that specifies exactly where lights go and how they work together as a system. In this guide, we’ll walk you through what a layout really means, how to build one step by step, and what pitfalls to avoid so your South DFW home gets the curb appeal it deserves.
Table of Contents
- What is a lighting layout? The foundation of great outdoor lighting
- Key elements of an outdoor lighting layout
- The power of layered lighting: Path, task, and accent effects
- Common pitfalls: Avoiding the ‘runway effect’ and installation missteps
- From plan to reality: Steps to create your own outdoor lighting layout
- Our perspective: Why layout is the unsung hero of outdoor lighting in South DFW
- Ready to light up your yard? Get expert help with your layout
- Frequently asked questions
Key Takeaways
| Point | Details |
|---|---|
| Layout over random placement | A lighting layout ensures a cohesive, safe, and striking outdoor space while scattered fixtures fall short. |
| Start with function, add beauty | Begin with circulation and focal points, then layer in style for both usability and curb appeal. |
| Layer lights for effect | Combining path, task, and accent lights creates depth and avoids dull, flat illumination. |
| Avoid common pitfalls | Stagger path fixtures, prevent ‘runway’ looks, and follow code for long-lasting results. |
| Plan before you buy | Sketching your design and testing placements leads to smart installation and outstanding ambiance. |
What is a lighting layout? The foundation of great outdoor lighting
A lighting layout is not a shopping list. It is a deliberate, documented plan that answers three core questions before a single fixture is ever purchased: Where will light land? How will different zones connect visually? And what purpose does each light serve?
As the Landscape Lighting Guide puts it, “a lighting layout is an organized plan that specifies where lights will be placed and how they work together to create a cohesive lighting system.” That word cohesive is the key distinction. Cohesion means your front yard, side gate, back patio, and driveway all feel like part of one intentional design after dark, not a patchwork of random brightness.
To understand why this matters, compare two scenarios:
Random fixture placement: A homeowner buys a six-pack of solar path lights and lines them along the walkway, adds a motion-sensor flood to the garage, and strings rope lights around the back porch railing. Each purchase made sense individually. Together, they produce clashing color temperatures, dead zones between zones, and a look that feels dated rather than designed.
A planned layout: That same homeowner sketches their property, identifies traffic paths, marks focal points like a mature oak or an arched front door, and assigns each zone a lighting role before buying anything. The result is a yard where light flows naturally from one area to the next. You can learn more about the lighting basics for homes that form the foundation of every successful permanent LED project.
Signs of a well-designed layout vs. a haphazard setup:
- Well-designed: Consistent light levels across zones, no harsh shadows at entry points, accent fixtures draw the eye to intentional focal points, and wiring is hidden or minimized.
- Haphazard: Bright spots next to pitch-black gaps, mismatched color temperatures (some warm, some cool white), fixtures pointed at the sky or into neighbors’ windows, and visible wiring running along the surface.
Key elements of an outdoor lighting layout
With a clear definition in mind, it is important to examine the major components that make up an effective lighting layout.
Residential outdoor layouts typically start with circulation paths and entry approaches, then add focal points, and plan transitions so the space looks connected after dark. Think of it as building from function first (where do people walk and enter?) to beauty second (what features deserve to stand out?).
Here are the core steps for creating a site sketch and assigning lighting roles:
- Draw your property outline. A rough hand sketch works fine. Mark the house footprint, driveway, walkways, garden beds, trees, and any structures like fences or pergolas.
- Trace every circulation route. Mark where guests walk from the street to the front door, where you walk to the mailbox, and how you move from the back door to the patio or garage.
- Identify focal points. These are the features you want people to notice: a stone facade, a mature shade tree, a decorative gate, or a water feature.
- Assign a lighting role to each zone. Label each area as path lighting (safety and movement), task lighting (functional use like grilling or reading), or accent lighting (visual interest and curb appeal).
- Select fixture types and plan wiring. Once roles are assigned, choose the right fixture for each job and plan your wiring from a properly sized transformer outward.
| Lighting type | Primary purpose | Typical outcome |
|---|---|---|
| Path lighting | Guide movement safely | Prevents trips, defines walkways |
| Task lighting | Illuminate functional areas | Better visibility at grills, seating, steps |
| Accent lighting | Highlight architectural or landscape features | Increases curb appeal, creates depth |
Proper layout methodology also covers the practical installation side: choosing fixture types, spacing them appropriately, and planning wiring from a properly sized transformer. For low-voltage LED systems, transformer sizing is especially important. Undersizing the transformer causes voltage drop, which makes distant fixtures dim compared to closer ones and shortens LED lifespan. Always calculate total wattage before selecting your transformer capacity.

Before finalizing your fixture list, review this outdoor lighting checklist to make sure your plan covers every zone.
Pro Tip: Overlap your light pools slightly between adjacent fixtures. A small overlap creates a smooth wash of light rather than separate spotlights with dark gaps between them. This single technique is what separates an amateur installation from a professional-looking result.
The power of layered lighting: Path, task, and accent effects
Once you understand the key layout elements, the next step is to see how the pros use layers to make outdoor lighting truly stand out.
Professional landscape layouts use multiple lighting layers: path for safety and movement, task for functional areas, and accent for trees and architectural details. The result is a yard with visual hierarchy and atmosphere instead of flat, uniform brightness. Layering is what gives a yard the look you see in magazine photos and model home tours.
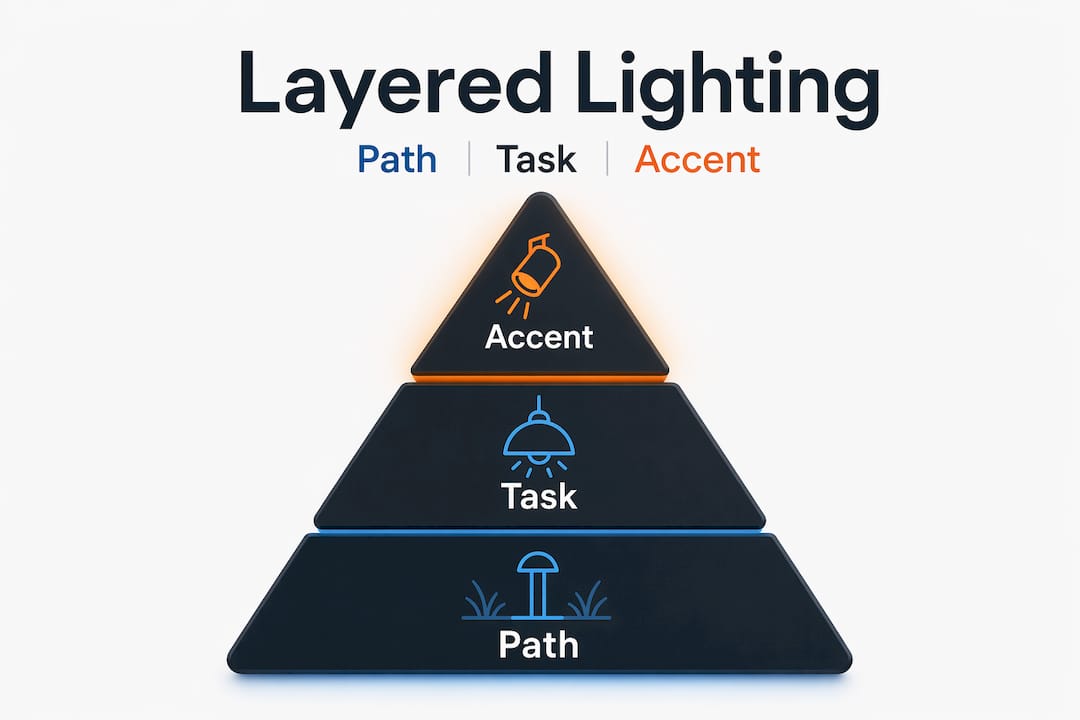
Here is how each layer contributes:
| Layer | Example fixtures | Practical outcome |
|---|---|---|
| Path | Low bollard lights, step lights | Safe navigation after dark, defined edges |
| Task | Downlights over seating, wall-mounted fixtures at grill stations | Functional visibility for outdoor activities |
| Accent | Uplights on trees, wall-wash LEDs on facades, color-changing eave lights | Drama, depth, and standout curb appeal |
A yard lit only with floodlights is the most common mistake we see in South DFW neighborhoods. Uniform brightness eliminates shadow and depth, which flattens everything visually. You need contrast to make a yard look interesting. A mix of path, task, and outdoor safety lighting with strategic accent fixtures creates that contrast naturally.
Common layering mistakes to avoid:
- Relying entirely on path lights with zero accent lighting
- Using only one color temperature across all three layers
- Installing accent uplights too close to a tree trunk, which creates a harsh, unnatural cone instead of a broad wash
- Skipping task lighting at functional zones like steps, grills, or garage entry points
- Over-accenting with too many focal points so the eye has nowhere to rest
Research consistently shows that well-layered outdoor lighting improves both the perceived safety of a property and its after-dark visual appeal. Homeowners who invest in layered designs report feeling more confident about their curb appeal year-round, not just during holiday seasons.
Common pitfalls: Avoiding the ‘runway effect’ and installation missteps
Even with a solid plan and good layering, certain mistakes can undermine your results. Here is what to watch for.
The runway effect is one of the most recognizable layout errors. It happens when path lights line both sides of a walkway in a perfectly even, symmetrical pattern at close intervals. The result looks exactly like an airport taxiway: functional, but cold and industrial. It signals to visitors that the lighting was installed without much thought.
“Layouts should avoid ‘runway’ or overly even path lighting; better designs stagger pathway fixtures and use overlap and shadow for a natural look.”
Top layout mistakes that undermine curb appeal and function:
- Lining both sides of a path with identical fixtures at equal intervals. This is the classic runway effect. It looks planned, but not in a good way.
- Ignoring local electrical code. Fixtures must be rated for wet or damp locations depending on their placement. Failing this creates safety hazards and code violations that can complicate home sales.
- Poor transformer placement. A transformer tucked away in an inconvenient location makes it harder to troubleshoot or adjust your system later.
- Skipping GFCI protection. Ground-fault circuit interrupter outlets are required by code for outdoor use, and for good reason.
- Running wire in a straight line to every fixture. A daisy-chain wiring run can cause uneven brightness. A “T” or “hub” method distributes power more evenly across multiple fixtures.
On the code side, NEC outdoor wiring requirements are clear: fixtures must carry the correct listing for their location (wet-rated for exposed areas, damp-rated for covered but exposed-to-moisture locations), and transformer placement for low-voltage systems must follow manufacturer and local guidelines. These are not optional details. Getting them wrong can mean tearing out completed work.
For additional guidance on building a system that lasts in South DFW’s climate, check out these durable outdoor lighting tips specific to our region.
Pro Tip: Stagger path lights 6 to 10 feet apart on alternating sides of the walkway rather than placing them face to face. This creates a natural, meandering quality to the light that feels inviting rather than institutional.
From plan to reality: Steps to create your own outdoor lighting layout
Armed with an understanding of what works (and what does not), here is how you can bring a custom layout to life for your South DFW home.
A homeowner-friendly approach starts with a site sketch, identifies circulation routes and focal zones, then assigns each zone a lighting role (path, task, or accent) before translating that into a fixture placement and wiring plan. This sequence matters. Decisions made in the right order prevent expensive backtracking later.
Here is the practical step-by-step process:
- Sketch your property to scale. You do not need CAD software. Graph paper and a tape measure are enough to produce a usable site plan.
- Mark all pedestrian and vehicle routes. Include the path from the street to your front door, any side yard access points, and the route from your back door to the patio, garage, or pool.
- Circle all focal points. Trees worth uplighting, architectural features on your facade, garden beds, water features, or outdoor art all qualify.
- Write the lighting role next to each zone. Path, task, or accent. Some areas may need two roles (a covered back porch might need both task lighting for cooking and accent lighting for ambiance).
- Select fixtures based on roles. Now that you know what each fixture needs to do, you can choose LED lights that match the function rather than just picking what looks appealing in a catalog.
- Plan your wiring runs and calculate transformer load. Add up the wattage of every fixture and choose a transformer with at least 20% extra capacity as a buffer for future additions.
- Test before committing. Use temporary clamp lights or battery-powered fixtures to preview placement before digging trenches or drilling into your fascia boards.
For permanent LED outdoor systems specifically, spacing, beam angle, glare control, and transformer and wire considerations all directly affect whether the system ends up bright, even, and comfortable, or spotty with hotspots and unwanted light spill. These are not cosmetic decisions. They determine how the system performs every single night for years.
Pro Tip: Test in place. Before finalizing any fixture location, spend one evening walking your yard with a powerful flashlight to simulate where light will land. This single step reveals problems with glare, dark gaps, and misdirected beams that are almost impossible to spot on paper.
Our perspective: Why layout is the unsung hero of outdoor lighting in South DFW
After years of designing and installing permanent LED systems across South DFW communities, we have arrived at one consistent truth: almost every outdoor lighting problem we are called in to fix traces back to layout decisions, not the hardware itself.
Homeowners often blame their fixtures when a system looks wrong. The lights feel too bright in one spot, too dark in another, or the overall effect just does not match what they imagined. In most cases, the fixtures are doing exactly what they were designed to do. The problem is where they were placed and what role was (or was not) assigned to them.
South DFW properties present a specific challenge that many generic lighting guides overlook. Yards here tend to be wider and more open than in older, urban neighborhoods. That horizontal expanse means light has farther to travel between fixtures, and the gaps become more obvious after dark. A layout designed for a compact lot in a dense suburb will not translate to a half-acre property in Mansfield or Midlothian without significant adjustment.
We also see homeowners invest significantly in high-quality LED fixtures, only to be underwhelmed because no thought went into layering or spacing. The best fixture on the market will still look mediocre if it is pointed at the wrong surface or spaced too far from its neighbor. Plan first, then buy. Every standout project we have completed in this region started with a thorough layout drawn on paper before anyone opened a box.
If you want to speak the same language as your installer and understand every decision being made for your yard, brushing up on outdoor LED lighting terms is a great starting point.
Ready to light up your yard? Get expert help with your layout
Now that you know what goes into a great layout, here is how to get personalized results from local experts.
At DFW LED Pro, we build custom lighting layouts for South DFW homeowners before a single fixture is installed. Our process starts with a site visit, a detailed plan, and a clear conversation about your goals, whether that is maximum curb appeal, enhanced safety, or the ability to change colors for every season and holiday. We serve communities across the region, including Lancaster and Mansfield, as well as Arlington, Burleson, Cedar Hill, Crowley, and dozens of surrounding cities.

Professional planning prevents the costly mistakes that come from skipping the layout phase. Contact us today for a free consultation and find out what a properly designed permanent LED system can do for your home’s outdoor spaces.
Frequently asked questions
What is the difference between a lighting layout and just adding lights?
A lighting layout is a planned design that coordinates light placement and functions across your entire property, while simply adding lights can result in a disjointed setup with uneven brightness and conflicting purposes. The layout is what turns individual fixtures into a unified system.
How many layers should a good outdoor lighting layout include?
Most professional layouts use at least three layers: path lighting for safety and movement, task lighting for functional zones, and accent lighting for visual depth. Three layers create the contrast and hierarchy that make a yard look professionally designed rather than simply illuminated.
What is the ‘runway effect’ and how do I avoid it?
The runway effect occurs when path lights line both sides of a walkway in a uniform, evenly spaced pattern that resembles an airport taxiway. Avoid it by staggering fixtures on alternating sides 6 to 10 feet apart and allowing light pools to slightly overlap for a natural, welcoming look.
What code considerations matter for outdoor lighting layouts?
NEC outdoor wiring requirements require fixtures to be rated for their specific location (wet or damp), GFCI protection on outdoor circuits, and proper transformer placement per manufacturer guidelines. Ignoring these requirements creates safety risks and potential issues during home inspections.
Can I plan my own lighting layout or do I need a professional?
Most homeowners can successfully sketch and plan a simple layout using the steps outlined in this guide, especially for low-voltage path and accent systems. However, permanent LED systems with complex wiring, multiple zones, and integrated controls typically benefit from professional input to avoid costly errors and ensure the result matches your vision.