Streamline your LED lighting with remote control workflow
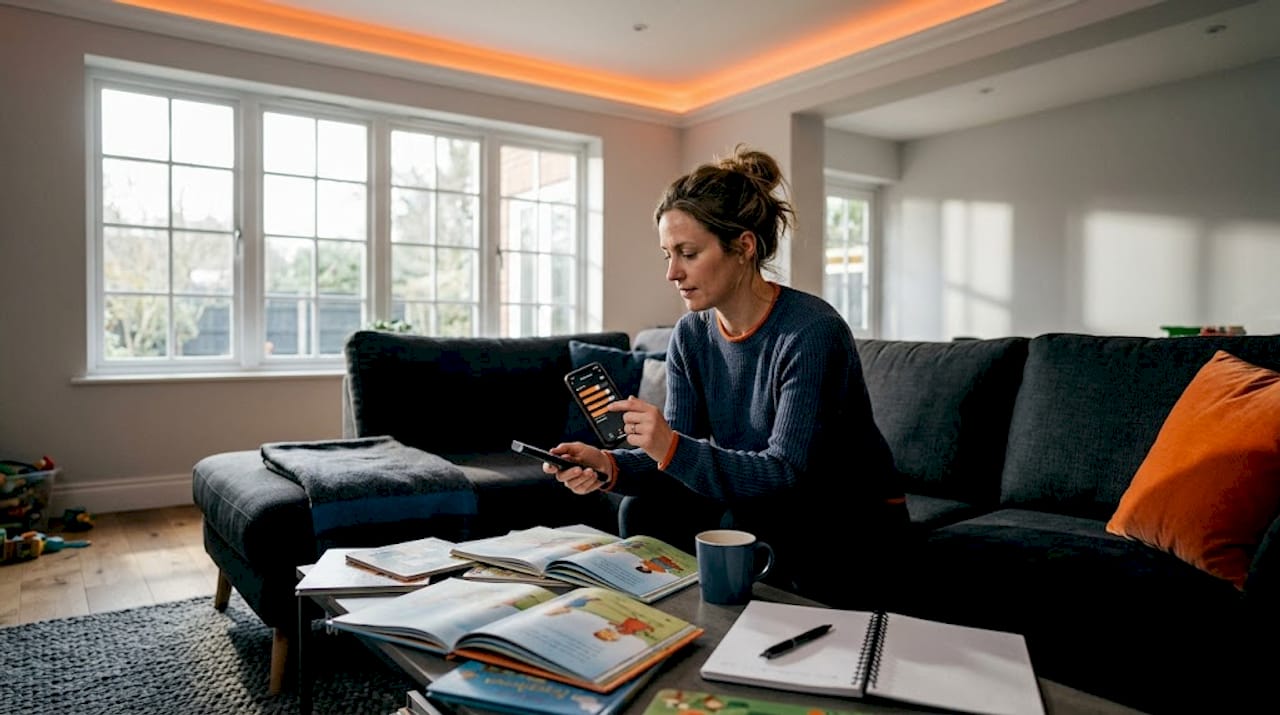
Walking through your home at night, flipping five different switches to control your outdoor lighting, is one of those small frustrations that adds up fast. Maybe you forget to turn off the front lights before bed, or you’re adjusting the backyard LEDs from inside while guests are waiting outside. Managing multiple lights from inconvenient locations wastes time, energy, and patience. Remote control automation paired with LED lighting solves all of that. This guide walks you through exactly what you need, how to set everything up, how to avoid the most common mistakes, and what a properly running system looks and feels like for your South DFW home.
Table of Contents
- What you need for a remote-controlled LED lighting workflow
- Step-by-step workflow: Setting up and automating LED lighting with remote control
- Troubleshooting and avoiding common mistakes
- What to expect: Results, workflow verification, and long-term benefits
- The truth about remote control workflows: What most guides miss
- Take the next step: Professional LED lighting solutions in South DFW
- Frequently asked questions
Key Takeaways
| Point | Details |
|---|---|
| Effortless control | Remote-controlled LED systems let you manage lighting from anywhere for unbeatable convenience. |
| Energy efficiency | Automated LED workflows can dramatically cut waste, saving up to 75 percent on lighting costs. |
| Fast, reliable responses | Leading solutions offer sub-200 millisecond response times for instant lighting changes. |
| Customizable automations | You can easily set up schedules, scenes, and smart triggers to match your routines. |
| Professional installation available | Local experts can help you avoid common pitfalls and future-proof your LED investment. |
What you need for a remote-controlled LED lighting workflow
With a clear problem in mind, let’s establish exactly what you need to get started before any installation begins.
A remote-controlled LED lighting workflow is the full sequence of actions from your remote, app, or voice command all the way to the actual light output at your fixtures. Getting that sequence right requires the right hardware and software working together from day one.
Here’s a checklist of what you’ll need before you start:
- LED lamps or fixtures compatible with your chosen control system (not all LEDs are dimmable or smart-ready)
- A compatible remote or controller (handheld RF remote, wall-mounted keypad, or smartphone app)
- A smart hub if you’re managing more than a handful of devices or want advanced automation
- A stable Wi-Fi or mesh network covering the areas where your lights are installed
- The manufacturer’s app for setup, scheduling, and energy monitoring
- A smartphone or tablet running a current operating system for full app compatibility
When evaluating which hub to choose, look for these features specifically:
- Energy monitoring so you can track actual kilowatt-hour consumption per zone
- App-based and local control so your lights still respond if your internet goes down
- Automation rule support including schedules, geofencing, and group control
- Integration with voice assistants like Amazon Alexa, Google Home, or Control4
System capacity matters more than most homeowners realize. A hub that maxes out at 10 devices will frustrate you the moment you want to expand. The Lutron Caseta hub supports up to 75 devices with sub-200ms local response time, making it one of the most reliable choices for larger homes or properties with extensive outdoor lighting.
| Feature | Basic Remote | Smart Hub System |
|---|---|---|
| Number of devices | 1 to 5 | Up to 75+ |
| App control | No | Yes |
| Scheduling | Limited | Full automation |
| Energy monitoring | No | Yes |
| Voice assistant support | No | Yes |
| Local backup control | Yes | Yes (best hubs) |
Explore smart outdoor solutions to understand which system tier fits your property size and goals. If you’re still weighing your options, our breakdown of the best control options for Dallas-Fort Worth homeowners is a solid starting point.
Pro Tip: Choose a hub that tracks energy use per zone or per device. That data tells you exactly where you’re wasting electricity and helps you fine-tune your automation rules over time.
Step-by-step workflow: Setting up and automating LED lighting with remote control
Once you’ve assembled your materials and tools, here’s exactly how to build a seamless and automated workflow for your remote LED lighting.
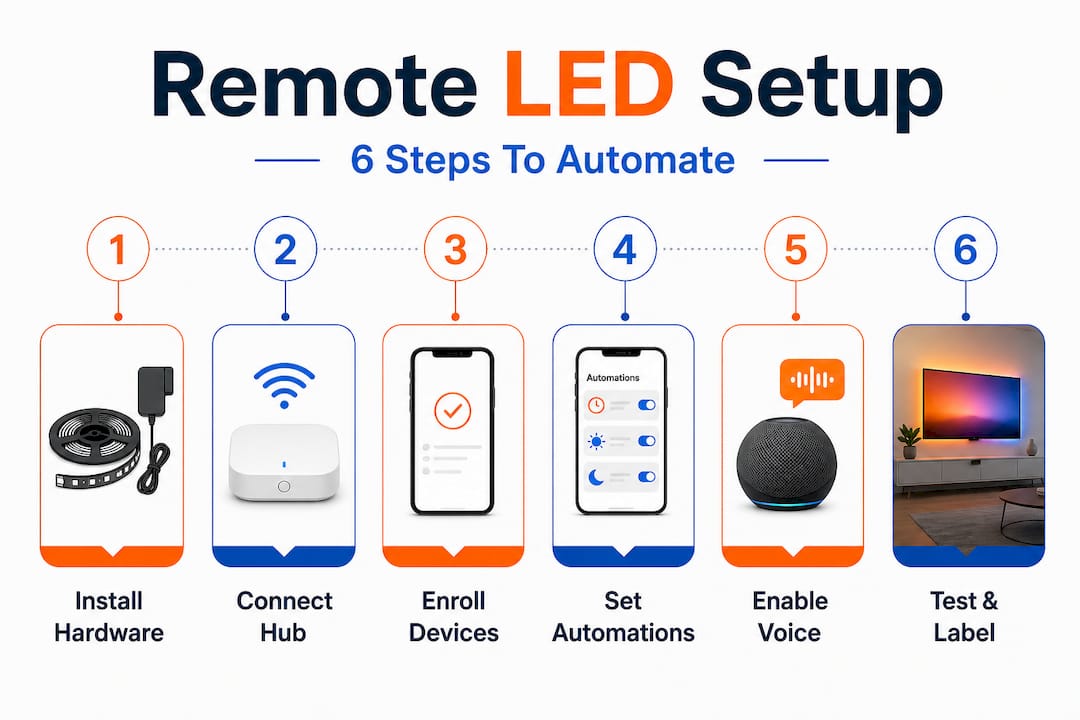
Step 1: Install and connect your LED hardware
Mount your LED fixtures or replace existing bulbs with smart-compatible LEDs. Run any necessary wiring to your switch locations. If you’re working with permanent outdoor LED systems, this step may involve channel mounting along rooflines or soffits. Make sure every fixture is on a circuit that your hub or controller can reach.
Step 2: Power up and connect your hub
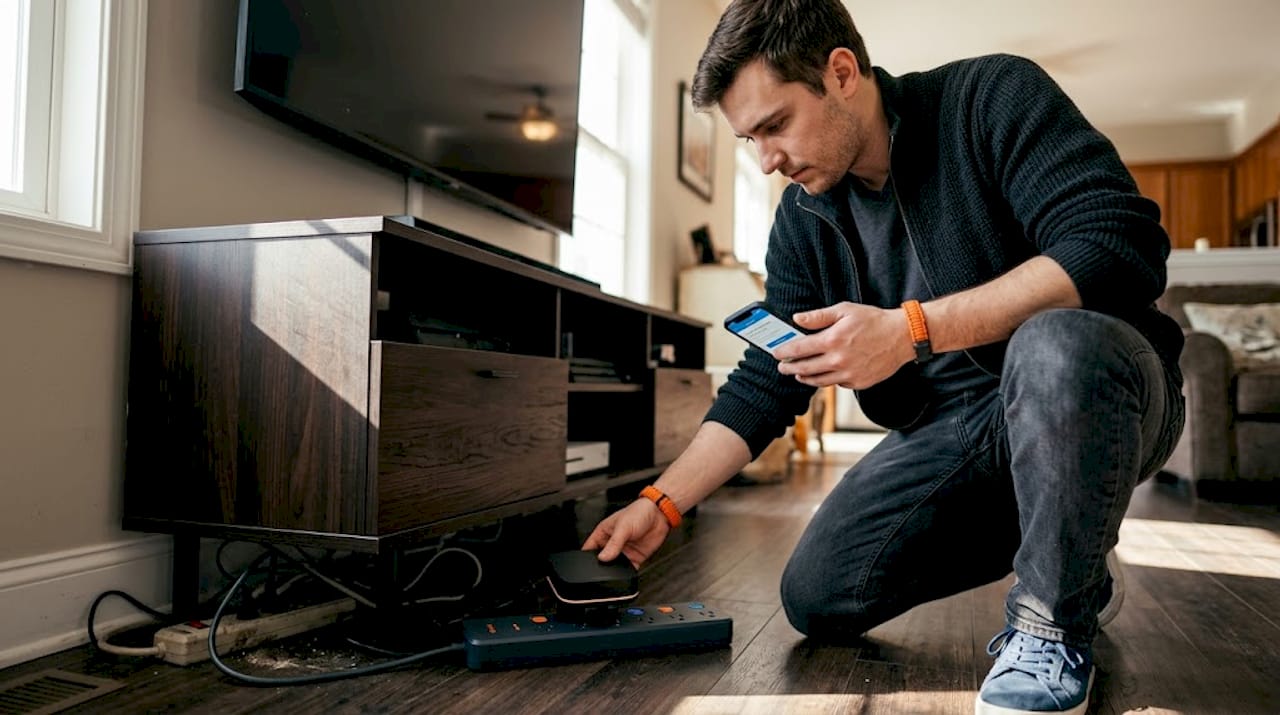
Plug in your smart hub and connect it to your home network using the manufacturer’s app. Most hubs use a combination of Wi-Fi and a proprietary radio protocol (like Lutron’s Clear Connect) for reliable communication. Follow the in-app setup wizard to complete network registration.
Step 3: Enroll your LED devices
Add each light or dimmer switch to your hub through the app. This usually means pressing a physical button on the device while the app scans for new hardware. Systems like Lutron Caseta, Amazon Alexa, Google Home, and Control4 all have guided enrollment flows. Lutron Caseta enables both local and app-based responses under 200ms, so once enrolled, your lights respond almost instantly.
Step 4: Create automation rules
This is where the real convenience starts. Set up:
- Schedules (e.g., front lights on at sunset, off at 11 PM)
- Geofencing (lights turn on when your phone arrives home)
- Group control (control all backyard lights with one tap)
- Scenes (a “party mode” that sets all outdoor lights to a warm amber at 60% brightness)
Check out our remote control savings guide for specific automation rule ideas that work well for South DFW homeowners. For a deeper look at the hardware side, our guide on how controllers work covers the technical details without the jargon.
Step 5: Configure voice assistant integration
Link your hub to Alexa, Google Home, or Control4 through the app’s integration settings. Once linked, you can control any enrolled device by voice. Our voice assistant setup guide walks through the exact steps for each platform.
Step 6: Test every device and scene
Run through each automation rule manually before relying on it. Trigger your schedules, test your scenes, and confirm every device responds correctly. Note any devices with slow response or dropped connections.
| Step | What happens | Time estimate |
|---|---|---|
| Hardware install | Fixtures mounted, wiring complete | 1 to 4 hours |
| Hub setup | Network connected, app configured | 15 to 30 minutes |
| Device enrollment | All lights added to hub | 20 to 45 minutes |
| Automation rules | Schedules, geofencing, scenes set | 30 to 60 minutes |
| Voice integration | Alexa/Google/Control4 linked | 10 to 20 minutes |
| Testing | All rules and devices verified | 20 to 30 minutes |
Pro Tip: Label every circuit and device in your app immediately after enrollment. Names like “Front Roofline Zone 1” or “Backyard Patio Left” save you significant confusion when editing automations six months later.
Troubleshooting and avoiding common mistakes
Even a perfect setup can run into hiccups. Here’s how to solve the most common issues and avoid frustration later on.
Lost connections
If a device drops off your hub, start with a power cycle. Turn the fixture off at the breaker, wait 10 seconds, and restore power. Then open your app and trigger a re-sync or re-enrollment for that device. Most connection drops are temporary and resolve with this simple step.
Incorrect device pairing
Always double-check that your LED fixtures, dimmers, and bulbs are listed as compatible with your specific hub. Not every smart dimmer works with every LED driver. Mismatched hardware is the number one cause of flickering, unresponsive devices, or failed pairing. Read the manufacturer’s compatibility list before purchasing.
Poor network coverage
Outdoor lighting zones at the edge of your property often sit at the edge of your Wi-Fi range. If you notice delayed responses or frequent drop-offs in specific zones, add a mesh network node closer to those fixtures. A strong signal at every fixture is non-negotiable for reliable automation.
App limitations
Some entry-level apps lack advanced scheduling or geofencing. If your current app doesn’t support the automation rules you want, consider upgrading your hub. App-based energy use data is available with modern hubs, giving you real visibility into your system’s performance. Pairing that data with smart energy savings and control strategies can significantly reduce your monthly utility costs.
Here are the most common mistakes to avoid:
- Setting up too many complex automation rules before testing simple ones first
- Ignoring firmware updates for your hub or devices
- Using incompatible dimmers with LED fixtures (causes flickering and shortened bulb life)
- Skipping the labeling step during device enrollment
- Relying solely on cloud control without enabling local backup
Safety note: If your lighting project involves new wiring, circuit modifications, or working inside your electrical panel, stop and call a licensed electrician. Working with household electricity without proper training creates serious shock and fire risks. For outdoor permanent LED systems in South DFW, professional installation is always the safer and more reliable path.
Pro Tip: Choose a hub that supports both local and app-based backup control. If your internet goes out during a storm, local control keeps your lights running on schedule without any interruption. For more practical advice specific to our area, our outdoor tips for South DFW covers weather-related considerations that matter here.
What to expect: Results, workflow verification, and long-term benefits
After troubleshooting, it’s time to assess whether your setup actually delivers the improved convenience and savings you expect.
A properly configured remote-controlled LED lighting workflow should feel nearly invisible in daily use. Your lights come on when they’re supposed to, respond instantly when you tap your app, and adjust automatically based on the rules you’ve set. Here’s what a healthy, well-functioning system looks like in practice.
Performance benchmarks to watch for:
- Response time under 200ms for local commands (you should see lights respond before you even finish the tap)
- Consistent schedule execution with no missed on/off events over a 7-day period
- Zero dropped devices after the first 48 hours of stable operation
- Energy data populating correctly in your app dashboard within the first billing cycle
Modern systems like Lutron Caseta provide up to 75 devices, energy data tracking, and sub-200ms responses as standard features. That combination of scale, speed, and visibility is what separates a professional-grade system from a basic smart plug setup.
Signs your setup is running smoothly:
- Lights turn on and off at the correct scheduled times without manual intervention
- Voice commands execute reliably on the first attempt
- Geofencing triggers within 1 to 2 minutes of arriving home or leaving
- App shows real-time energy consumption per zone
- No flickering, buzzing, or partial dimming at any fixture
Long-term flexibility
One of the strongest arguments for investing in a hub-based system is how easily it grows with you. Start with your front roofline and patio, then add the backyard, garage, and landscape lighting over time. All of it lives in one app, controlled by one set of automation rules. Our saving time and energy tips guide shows real-world examples of how South DFW homeowners have expanded their systems over one to three years without replacing any core hardware.
Energy savings are real and measurable. Automating LED lighting so fixtures only run when needed, at the right brightness level, eliminates the waste that comes from lights left on all night or running at full power when 60% is more than enough. Track your monthly kilowatt-hour totals in your app and compare them month over month to see the direct impact.
The truth about remote control workflows: What most guides miss
Most articles about smart lighting focus almost entirely on the technology. Pick the right hub, install the app, set your schedule, done. That’s accurate as far as it goes, but it misses the part that actually determines whether your system works well six months from now.
The homeowners we work with across Fort Worth, Mansfield, Burleson, and Cedar Hill who get the most out of their LED lighting systems are not necessarily the ones with the most advanced hardware. They’re the ones who took 20 minutes to label every device clearly, who built simple automation rules first and added complexity gradually, and who test their schedules once a month to confirm everything is still running correctly.
Smart lighting systems fail most often because homeowners try to automate too much too fast. They build 15 different scenes, set up geofencing with three different triggers, and add voice commands for every individual fixture. Then one rule conflicts with another, a device gets renamed, and the whole thing becomes a management headache instead of a convenience. The best workflow is the one you almost never have to touch.
Our honest advice: start with two or three automation rules that solve your most annoying daily problems. Lights on at sunset, off at a set time. Porch lights triggered by motion after dark. Backyard lights controlled as a single group. Get those working perfectly, then expand. That approach builds a system that genuinely fits your lifestyle rather than one that requires constant attention.
We’ve written extensively about this in our expert LED guides, and the pattern holds across every property type we work with. Simplicity, reliability, and clear organization beat complexity every time.
Take the next step: Professional LED lighting solutions in South DFW
If you’re ready to make the most of smart LED lighting, here’s how to get expert help and finish your project efficiently.
Setting up a remote-controlled LED lighting workflow on your own is absolutely possible, but getting the hardware selection, wiring, and automation configuration right the first time saves you significant time and rework. That’s where we come in.
At DFW LED Pro, we handle permanent outdoor LED lighting installations across 35+ cities in the Dallas-Fort Worth area, including Fort Worth, Mansfield, Burleson, Grand Prairie, and Cedar Hill. Our Fort Worth professional LED installation service covers everything from initial design to full automation configuration, so your system is ready to run from day one. We install JellyFish LED solutions that are built for permanent outdoor use, complete with app control, scheduling, and color customization. Contact us today to schedule a consultation and see what a professionally installed, fully automated LED system looks like on a South DFW home.
Frequently asked questions
How many LED devices can a smart hub control?
Most modern hubs can control up to 75 devices per hub; always check the manufacturer’s specs before purchasing to confirm your system can scale to your full property.
Can I automate LED lighting by schedule or sensor?
Yes, you can set up schedules or automate with motion sensors via most hub and app integrations. Automation rules via app-based platforms are standard on all major smart lighting systems including Lutron, Alexa, and Google Home.
What kind of response times should I expect from remote controls?
Top-tier systems provide local response in under 200 milliseconds, and app control nearly as fast. Lutron Caseta offers sub-200ms local response, which means your lights react before you even lift your finger from the screen.
Will remote-controlled LEDs reduce my home’s energy use?
Yes, automating LED lighting typically cuts wasted usage significantly. Home lighting automation can yield up to 75% energy savings compared to manually controlled incandescent or unmanaged LED systems.