Seasonal Lighting Changeover Steps for Homeowners

Seasonal lighting changeover steps are the essential procedures homeowners use to adjust outdoor lights for shifting weather, daylight hours, and seasonal growth. Done right, they improve curb appeal, prevent electrical hazards, and cut energy waste. Done wrong, they leave dark zones, corroded connectors, and tripped GFCI breakers. This guide walks you through the full lighting changeover workflow, from pre-season prep to smart automation, so your outdoor lighting works exactly as intended every time the calendar turns.
What tools and preparations do you need before seasonal lighting changeover?
Preparation separates a smooth seasonal light transition from a frustrating afternoon of troubleshooting. Before you touch a single fixture, gather the right tools and do a proper system review.
Essential tools for every changeover:
- A sturdy ladder rated for your roofline height
- Insulated gloves and a non-contact voltage tester
- Lens cleaning cloths and a mild detergent solution
- Replacement gaskets, wire nuts, and dielectric grease
- A notepad or phone app to log fixture locations and zone assignments
- Labeled storage bins or NFC tags for seasonal components
Labels and NFC tags on storage bins cut setup time and prevent confusion when you pull everything out six months later. That one habit alone saves most homeowners 30 minutes or more per changeover.
System inspection comes before any physical work. Walk your property and look for cracked conduit, loose junction box covers, and fixtures that have shifted from frost heave or wind. Plan for 1–2 professional maintenance visits per year alongside your own seasonal checks. Professional eyes catch voltage drop issues and wiring faults that are easy to miss on a casual walkthrough.

Pro Tip: Label every lighting zone with a numbered tag at the transformer or control panel. Keep a simple spreadsheet that maps each zone number to its fixture type, wattage, and location. You will thank yourself every single changeover.
A nighttime property walk is the single best way to identify true lighting needs before you start. Dark zones that look fine in daylight become obvious safety hazards after sunset. Walk the full perimeter, driveway, and entry points with a critical eye before planning any fixture adjustments.
How do you execute seasonal lighting changeover step by step?
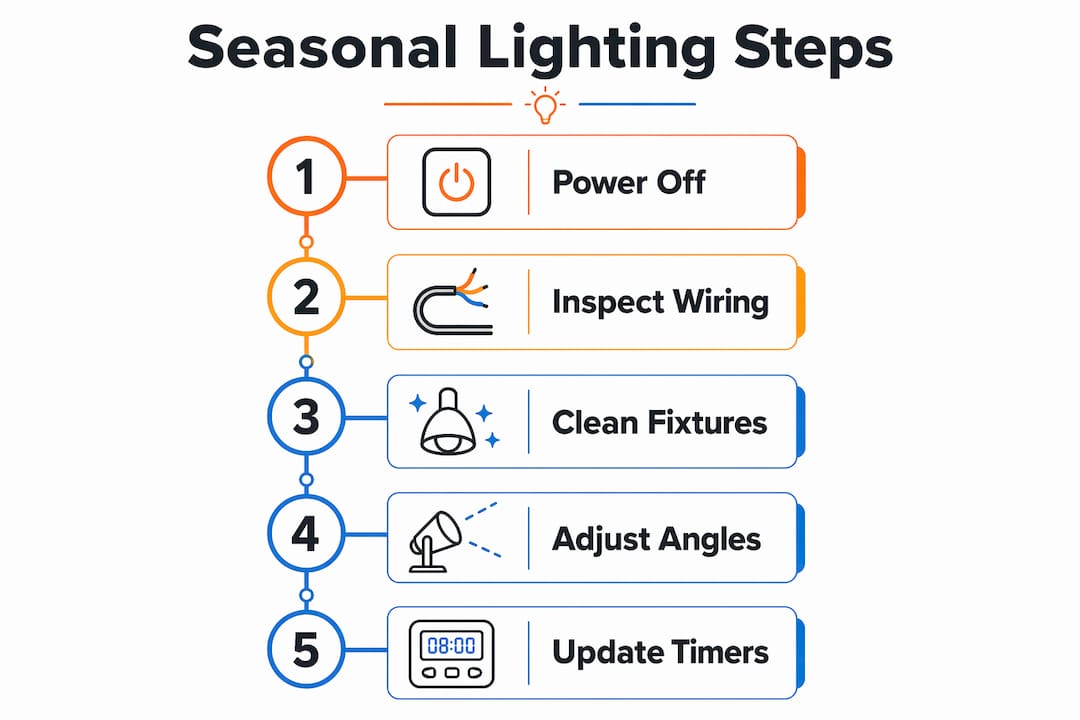
The core of any lighting changeover guide is a repeatable, ordered process. Skipping steps creates compounding problems. Follow this sequence every season.
-
Shut down the system completely. Turn off power at the transformer and the main breaker for outdoor circuits. Confirm with a non-contact voltage tester before touching any wiring.
-
Inspect all wiring and connectors. Check for nicks in cable insulation, especially along fence lines and near garden beds where foot traffic or lawn equipment can cause damage. Inspect cables after freeze-thaw cycles to catch nicks or damage before reburying. A damaged cable reburied without repair will cause a ground fault within one season.
-
Clean lenses and replace worn gaskets. Dirty lenses reduce output by a measurable amount over a single season. Replacing dried or cracked gaskets before spring storms prevents moisture from entering fixtures and causing failures. Use a soft cloth and mild soap, then dry completely before reassembly.
-
Apply dielectric grease to all connectors. Dielectric grease on connectors dramatically reduces corrosion and extends reliability, especially in North Texas where summer humidity and freeze-thaw cycles stress connections hard. Apply a thin coat to every connector before reconnecting.
-
Adjust fixture angles and spacing for seasonal changes. Trees and shrubs grow between seasons. A tree uplight that worked perfectly in october may now be blocked by new growth by april. Optimal path light spacing runs 8–12 feet, with tree uplights placed 2–5 feet from the trunk base. Recheck these distances every season and reposition as needed.
-
Trim overgrowth around fixtures. Professional maintenance includes trimming overgrowth around fixtures to maintain lighting quality. Overgrown shrubs block beam spread and create uneven illumination that undermines the whole design.
-
Restore power and test every zone. Turn on one zone at a time. Check for flickering, dimming, or GFCI trips. Walk the property again after dark and compare what you see to your zone map. Adjust aim on any fixture that has drifted.
Pro Tip: Take photos of your fixture positions and angles before and after each changeover. A simple phone photo library organized by season gives you a visual baseline that makes next year’s adjustments faster and more accurate.
For a full outdoor LED lighting checklist tailored to DFW conditions, Dfwledpro has a detailed resource that covers zone-by-zone verification steps.
How can smart home automation simplify seasonal lighting changeover steps?
Smart automation removes the biggest pain point in seasonal lighting: remembering to update your timer schedules. Manual timers drift off by weeks during seasonal shifts. Sunset-relative triggers are the smarter, low-maintenance solution for consistent outdoor lighting year-round.
A sunset-relative trigger tells your system to turn lights on 15 minutes after sunset, regardless of what time that is on any given day. The system adjusts automatically as days shorten in fall and lengthen in spring. Initial setup takes about 5 minutes and covers the entire season. That is a one-time investment that pays off every evening.
Automation tools worth adding to your setup:
- Outdoor smart plugs with scheduling apps for low-voltage transformer control
- RGBIC bulbs in porch and accent fixtures for color scene changes by season
- Kasa or Home Assistant for multi-zone scheduling and sunset-relative triggers
- Scene scripts and “Holiday Mode” routines that toggle entire lighting zones with one command
Scene management and Holiday Mode scripts allow quick toggling of entire lighting zones, saving significant time during seasonal adjustments. Instead of adjusting 12 individual fixtures, you activate one scene and the whole property shifts. For deeper integration options, Dfwledpro’s guide on adding smart controls covers compatible hardware and app setup for DFW homeowners.
You can also pair smart automation with a solid seasonal lighting automation strategy to maximize both curb appeal and energy savings across every season.
Pro Tip: Start automation with a single zone, such as your front entry path lights, before expanding system-wide. One zone lets you test trigger timing and scene settings without committing your entire property to a configuration you have not verified.
What common mistakes cause seasonal lighting problems, and how do you fix them?
Most seasonal lighting failures trace back to a short list of avoidable errors. Knowing what to watch for saves you from repeat troubleshooting calls.
- Reburying cables without inspection. Cables that survived one winter may have hairline cracks in the insulation. Reburying them without checking creates shorts that trip breakers mid-season.
- Ignoring connector corrosion. Flickering or color shifts in outdoor lighting are often blamed on software or bulb issues. Moisture and corrosion are the real causes in most cases. Pull connectors apart, clean the contacts, and apply dielectric grease before reconnecting.
- Skipping timer updates after daylight saving time. A timer set for 6:00 PM in november runs an hour off after the spring clock change. Use sunset-relative triggers to eliminate this problem entirely.
- Overloading circuits when adding seasonal fixtures. LED lighting with proper power planning avoids voltage drop and dimming in longer runs. Calculate your total wattage load before adding new fixtures to an existing circuit.
- Missing GFCI trips. A tripped GFCI outlet kills an entire zone silently. Check every GFCI outlet on your outdoor circuits at the start of each season and after any heavy rain.
For a broader look at seasonal preparation, the spring landscape maintenance checklist from Village Precision Pros covers outdoor lighting alongside other seasonal property tasks.
“A successful seasonal lighting transition is 80% inspection and 20% adjustment. The homeowners who skip the inspection phase are the ones calling for emergency repairs in december.”
Troubleshoot systematically. Start at the transformer, work outward zone by zone, and test each connection point before moving to the next. Random troubleshooting wastes time and often misses the root cause.
Key Takeaways
A complete seasonal lighting changeover requires inspection, physical adjustment, and automation updates working together. Skipping any one of these three steps creates the failures most homeowners blame on equipment.
| Point | Details |
|---|---|
| Prep before you touch anything | Gather tools, label zones, and walk the property after dark before starting any changeover work. |
| Inspect cables and connectors every season | Check for nicks after freeze-thaw cycles and apply dielectric grease to every connector before reassembly. |
| Adjust fixture placement for seasonal growth | Recheck path light spacing (8–12 feet) and uplight distance (2–5 feet from trunk) after each growing season. |
| Use sunset-relative triggers, not manual timers | Automated triggers adjust daily without intervention and take about 5 minutes to configure for the full season. |
| Start automation with one zone | Test trigger timing and scene settings on a single zone before expanding the configuration system-wide. |
What I have learned from years of seasonal lighting changeovers
The homeowners who get the best results from their outdoor lighting are not the ones with the most expensive fixtures. They are the ones who treat changeover as a scheduled maintenance event, not a reaction to something breaking.
The nighttime walkthrough is the step most people skip. You cannot evaluate your lighting in daylight. Period. I have seen beautifully designed systems that left the front entry completely dark because no one walked the property after sunset before signing off on the installation. That one habit changes everything.
The other thing I would push back on is the idea that smart automation is complicated. A single sunset-relative trigger on your front path lights takes five minutes to set up and runs itself for the entire season. You do not need a full smart home ecosystem to get real value from automation. Start with one zone, prove the concept, and expand from there.
For DFW homeowners specifically, the freeze-thaw cycles we see between november and march are harder on connectors and gaskets than most people realize. Dielectric grease is not optional here. It is the single cheapest maintenance step with the highest return on reliability. If you do nothing else from this guide, do that.
Partial professional maintenance, even for confident DIYers, catches the things you cannot see. Voltage drop across a long run, a hairline crack in buried conduit, a transformer that is running at 95% capacity. Those are not visible on a casual walkthrough. One professional visit per year is worth every dollar.
— Adrian
Permanent LED lighting: a smarter alternative to seasonal changeovers
If you are tired of the twice-yearly changeover cycle, a permanent LED system removes most of that work entirely.

Dfwledpro installs permanent outdoor LED lighting across 35+ cities in the Dallas-Fort Worth area, including Fort Worth, Arlington, Cedar Hill, and Mansfield. JellyFish Lighting systems are built into your roofline and controlled through a single app. You change colors and scenes for every holiday or season without touching a ladder or a connector. The system handles freeze-thaw cycles, summer heat, and North Texas humidity without seasonal teardown. If you want year-round curb appeal without the annual maintenance grind, contact Dfwledpro to schedule a consultation.
FAQ
What are the basic seasonal lighting changeover steps?
The core steps are: shut down power, inspect wiring and connectors, clean lenses, replace gaskets, adjust fixture angles for seasonal growth, and test every zone after restoring power. Following this sequence in order prevents most common failures.
How often should I update my outdoor lighting timers?
Update timer schedules at every daylight saving time change and at the start of each season. Sunset-relative triggers eliminate this task entirely by adjusting automatically to daily sunset times.
What causes flickering in outdoor lighting after a seasonal changeover?
Flickering most often traces to moisture in connectors or corroded contacts, not bulb or software issues. Pull connectors apart, clean the contacts, and apply dielectric grease before reconnecting to resolve most flickering problems.
How far apart should path lights be placed?
Path lights perform best at 8–12 feet apart. Tree uplights work best when placed 2–5 feet from the trunk base for even, dimensional illumination without harsh shadows.
When should I call a professional for seasonal lighting maintenance?
Schedule a professional visit at least once per year, ideally before the heavy-use winter season. Professionals check voltage drop, buried cable integrity, and transformer load, which are issues that are difficult to assess without specialized equipment.