How to Plan Home Exterior Lighting: 2026 Guide

Home exterior lighting planning is the process of strategically designing and installing outdoor lighting systems to enhance safety, security, and curb appeal. Knowing how to plan home exterior lighting before you buy a single fixture saves you from costly rework, code violations, and a yard full of mismatched lights. The process covers four core steps: zoning your property, selecting the right fixtures, mapping your electrical layout, and executing installation to 2026 code standards. Get these steps right, and your outdoor space works for you every night of the year.
How to plan home exterior lighting by dividing your property into zones
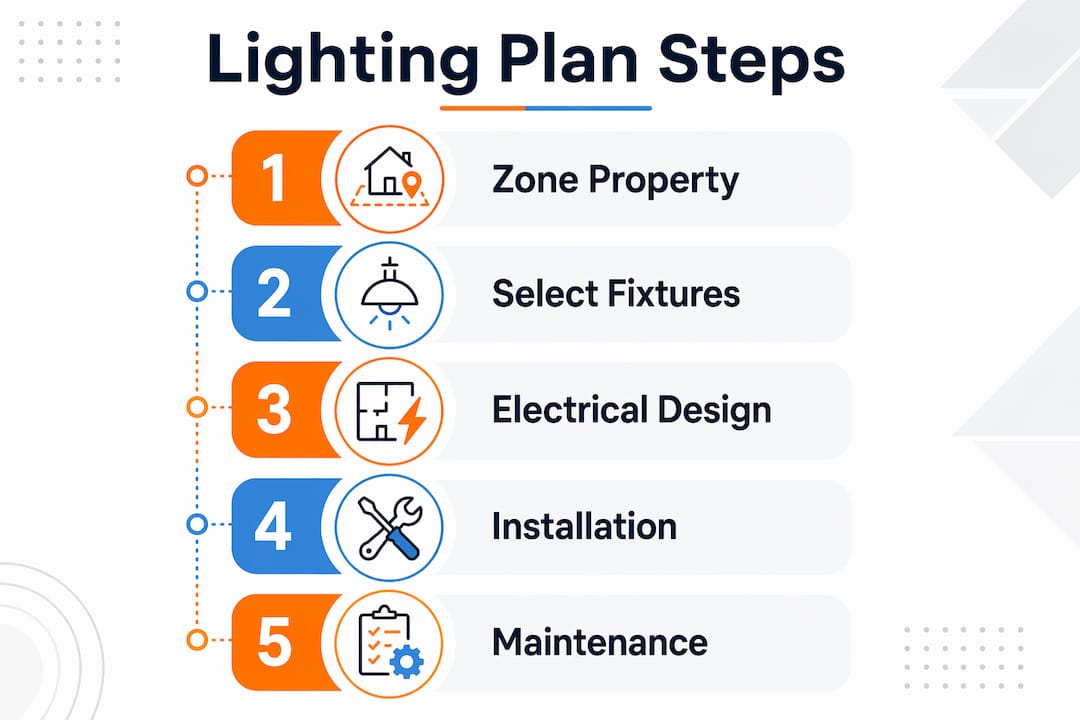
Dividing your property into zones is the single most effective way to avoid over-buying fixtures and under-serving real lighting needs. Each zone has a distinct function, and that function drives every decision about fixture type, brightness, and placement.
The most common residential outdoor zones are:
- Front entry: Welcoming light at the door, typically wall sconces or overhead fixtures at 100–300 lumens
- Driveway: Path and area lighting for safe vehicle movement, using bollards or low-profile ground fixtures
- Walkways and paths: Step lights or path lights spaced 6–8 feet apart to guide foot traffic safely
- Patio or deck: Ambient and task lighting for outdoor living, often string lights, recessed deck lights, or wall-mounted fixtures
- Backyard perimeter: Security-focused floodlights or motion-activated fixtures covering fence lines and gates
- Landscape and accent zones: Spotlights or well lights aimed at trees, architectural features, or garden beds
Zoning also guides your circuit planning. A patio zone running ambient string lights draws far less power than a perimeter zone running security floodlights. Grouping zones by function lets you size transformers and circuits accurately from the start. You also avoid the common mistake of running every fixture off one overloaded circuit.
Pro Tip: Walk your property at night before drawing any plan. A nighttime walkthrough reveals actual dark zones and blind spots that daytime planning misses entirely.
Which fixture types suit different outdoor lighting needs?
Matching the right fixture to each zone is where most homeowners make their biggest mistakes. Choosing a floodlight for a garden path creates glare. Choosing a path light for a security zone leaves you with inadequate coverage.
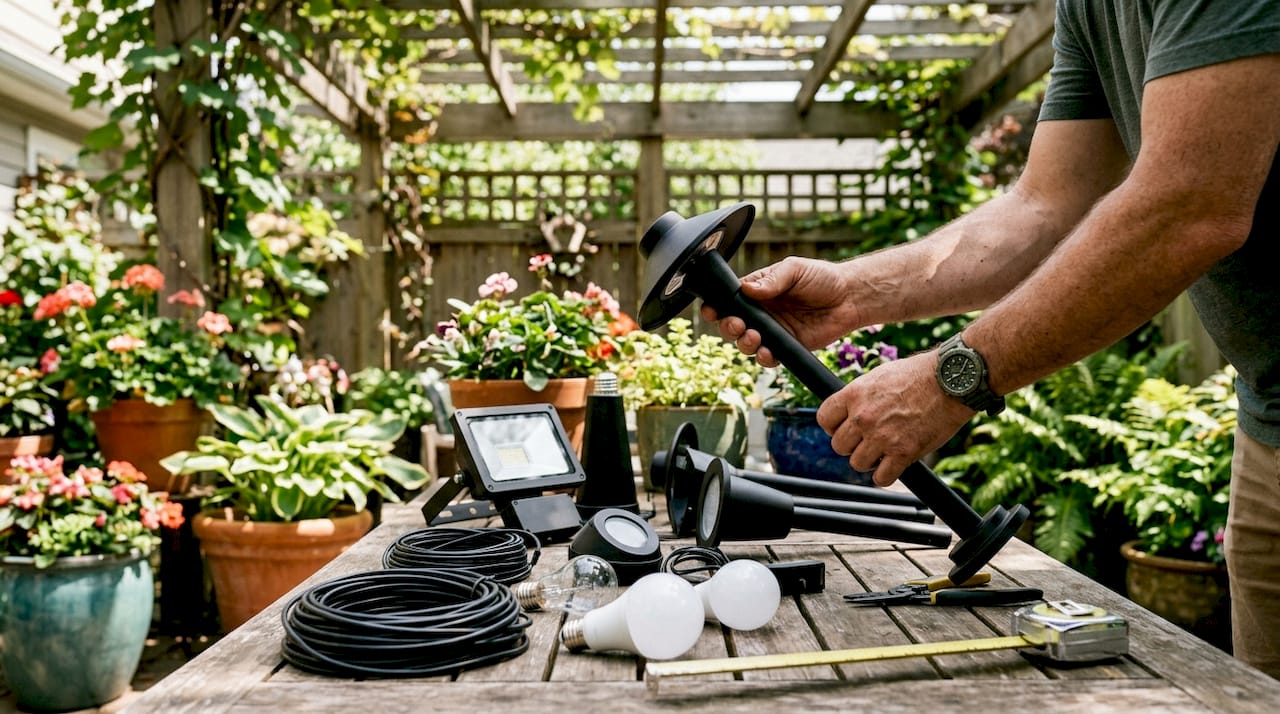
| Fixture Type | Best Zone | Lumen Range | Primary Role |
|---|---|---|---|
| Path lights | Walkways, driveways | 100–200 lumens | Guidance and safety |
| Spotlights | Landscape, architecture | 200–400 lumens | Accent and focal points |
| Floodlights | Perimeter, driveway | 700–1,300 lumens | Security and area coverage |
| Wall sconces | Entry, patio | 150–400 lumens | Ambiance and welcome |
| Step lights | Stairs, deck edges | 50–150 lumens | Safety and definition |
| Well lights | Trees, garden beds | 200–500 lumens | Upward accent lighting |
Warm white LED color temperatures in the 2700K–3000K range create a welcoming, residential feel. Cooler temperatures above 4000K read as harsh and commercial on a home exterior. Stick to warm white for every zone except dedicated security areas where visibility matters more than aesthetics.
Beam angle controls how light spreads. A narrow beam of 15–25 degrees works for uplighting a tree trunk. A wide beam of 60–120 degrees suits path lights and wall washes. Over-lighting creates glare and a flat, washed-out appearance. Shielded fixtures with controlled aiming produce far better results than raw brightness.
Material matters for longevity. Brass and copper fixtures resist corrosion and last decades. Plastic fixtures degrade in UV exposure within a few years, especially in Texas heat. For permanent installations, brass or powder-coated aluminum is the right call.
Pro Tip: Aim for 1.5 watts of LED per square foot as a starting brightness target. Pathways need roughly 100 lumens per fixture; security floodlights need 700–1,300 lumens.
What electrical planning steps are essential for outdoor lighting?
Wiring routes, transformer placement, and circuit capacity must be planned before you purchase a single fixture. Skipping this step leads to expensive rework and potential code violations.
The first decision is voltage. Low-voltage systems run at 12V and suit landscape, path, and accent lighting. They are safer to install and easier to modify. Line-voltage systems run at 120V and are required for permanent high-output fixtures like security floodlights and hardwired wall sconces. Line-voltage work typically requires a licensed electrician.
Trenching depth is set by 2026 electrical codes:
- Low-voltage cable (12V): minimum 6 inches deep
- Line-voltage cable (120V): minimum 18 inches deep
- All buried conduit: follow local AHJ requirements, which may exceed national minimums
- GFCI protection: required on all outdoor circuits without exception
- Weatherproof connectors and boxes: required at every outdoor junction point
Size your transformer at 80% of its rated capacity. A transformer rated for 300 watts should carry no more than 240 watts of fixtures. This buffer prevents dimming, flickering, and premature transformer failure. It also leaves room to add fixtures later without buying new equipment.
Call 811 before any digging to have underground utilities marked. Gas lines, water mains, and buried electrical cables run through most residential yards. Hitting one costs far more than the phone call to prevent it.
Wire gauge affects brightness consistency across your system. 12-gauge wire on longer runs prevents voltage drop that causes fixtures at the end of a run to dim. Home-run wiring, where each fixture connects directly to the transformer, performs better than daisy-chain wiring on runs longer than 100 feet.
Step-by-step process to lay out and install your system
Execution without a plan produces a yard full of misplaced fixtures and buried cables you will regret. Follow this sequence to get it right the first time.
- Draw a scaled property diagram. Sketch your home’s footprint, driveway, paths, and planting beds to scale. Mark each proposed fixture location with its type and lumen output.
- Calculate total wattage per zone. Add up fixture wattages for each circuit and confirm your transformer or panel circuit can handle the load at 80% capacity.
- Dry-fit all fixtures before burial. Place fixtures in their planned positions and run cables loosely on the surface. Test the full system at night before digging anything.
- Adjust placement based on nighttime testing. A nighttime test run shows glare problems, dark gaps, and misdirected beams that no daytime plan reveals.
- Trench and bury cables to code depth. Follow the 6-inch rule for low-voltage and 18-inch rule for line-voltage per 2026 standards.
- Mount fixtures and make final connections. Use weatherproof connectors at every splice. Seal all entry points where cables pass through walls or posts.
- Test again and fine-tune aim. Walk every zone at night and adjust spotlight angles, floodlight coverage, and path light spacing until the result matches your zone goals.
Pro Tip: Use the outdoor lighting installation checklist from Dfwledpro to track each step and avoid skipping critical safety tasks.
The most common installation mistakes are burying cables before testing, undersizing transformers, and skipping GFCI protection. Each one creates a problem that costs more to fix than it would have cost to prevent.
| Installation Phase | Common Mistake | Correct Approach |
|---|---|---|
| Layout | Placing fixtures by eye in daylight | Test placement at night before burial |
| Electrical | Daisy-chaining long runs | Use home-run wiring for runs over 100 feet |
| Burial | Skipping code depth | 6 inches for 12V, 18 inches for 120V |
| Connections | Using indoor connectors outdoors | Use weatherproof, gel-filled connectors |
How to maintain and optimize your system over time
A well-installed exterior lighting system lasts years with minimal effort. Consistent maintenance protects your investment and keeps performance where you set it.
- Quarterly inspections: Check every fixture for water intrusion, cracked lenses, and loose connections. Moisture inside a fixture corrodes the socket and kills the LED faster than any other factor.
- Lens cleaning: Dirty lenses reduce output significantly. Wipe lenses with a damp cloth each season to maintain rated brightness.
- Vegetation trimming: Overgrown shrubs and low branches block fixture aim and trap moisture against housings. Trim plants around fixtures at least twice a year.
- Timer and sensor resets: Adjust dusk-to-dawn timers and motion sensor sensitivity each spring and fall as daylight hours shift. Smart controls like timers and motion sensors automate this process and cut energy use without reducing coverage.
- Spotlight re-aiming: Frost heave, soil settling, and accidental kicks shift fixture aim over time. Re-aim spotlights and path lights annually to restore your original coverage plan.
- LED replacement: Quality LED fixtures last 50,000 hours or more. When output drops noticeably, replace the LED module rather than the entire fixture to save cost.
For homeowners interested in outdoor LED benefits, the energy savings and lifespan advantages over traditional bulbs make LED the only practical choice for permanent exterior systems.
Key Takeaways
Effective exterior lighting planning requires zoning your property, matching fixtures to function, sizing electrical systems to 80% capacity, and testing placement at night before burial.
| Point | Details |
|---|---|
| Zone before you buy | Divide your property into functional zones to match fixture types and circuit capacity to real needs. |
| Match fixture to function | Use 700–1,300 lumen floodlights for security and 100-lumen path lights for walkways. |
| Size transformers correctly | Load transformers to 80% capacity to prevent dimming and allow future expansion. |
| Test at night before burial | A nighttime dry-fit reveals glare, dark gaps, and misdirected beams no daytime plan can show. |
| Maintain quarterly | Inspect for moisture, clean lenses, re-aim spotlights, and reset timers each season. |
Why restraint is the most underrated skill in exterior lighting
Most homeowners I talk to assume more fixtures equals better lighting. That assumption is wrong, and it produces some of the worst-looking yards I have seen. Bright, flat, wall-to-wall illumination kills depth, creates glare, and makes a home look like a parking lot at night.
The best exterior lighting systems I have worked with use a layered approach: ambient light for general visibility, task light for specific functional areas, and accent light to highlight architecture or landscape features. Each layer operates at a different brightness level. The contrast between them is what creates visual interest and a welcoming appearance.
The other mistake I see constantly is homeowners skipping professional electrical planning because the low-voltage portion of the job looks simple. It often is simple. But the moment you add permanent hardwired fixtures, security floodlights, or a new outdoor circuit, you are in line-voltage territory. That work requires permits, inspections, and a licensed electrician in most jurisdictions. Cutting corners there creates fire risk and kills your homeowner’s insurance coverage if something goes wrong.
Plan with restraint. Buy fewer, better fixtures. Test everything at night before you bury a single cable. The result will look intentional, not accidental.
— Adrian
Professional LED lighting installation in Dallas and Lancaster, TX
Planning your exterior lighting system is the hard part. Having it installed correctly and permanently is where Dfwledpro makes the difference for homeowners across the Dallas-Fort Worth area.
Dfwledpro is the official authorized JellyFish Lighting dealer for the DFW metroplex, serving 35+ cities including Dallas, Lancaster, Arlington, Fort Worth, and Mansfield. We handle everything from initial zone planning to final fixture mounting and electrical connection. Our permanent LED lights in Lancaster, TX and permanent LED installation in Dallas give homeowners a professionally designed system built to 2026 code standards with a lifetime warranty on fixtures. Contact us for a free consultation and let us turn your lighting plan into a finished installation.
FAQ
What is exterior lighting planning?
Exterior lighting planning is the process of dividing your property into lighting zones, selecting appropriate fixtures, and mapping electrical layout before installation. It covers safety, aesthetics, and code compliance in a single coordinated plan.
How deep do outdoor lighting cables need to be buried?
Low-voltage cables require 6 inches of burial depth, while line-voltage cables require at least 18 inches per 2026 electrical codes. Always check local AHJ requirements, which may be stricter.
What color temperature is best for residential outdoor lighting?
Warm white LEDs at 2700K–3000K are the standard for residential exteriors. They create a welcoming appearance without the harsh, commercial look of cooler color temperatures.
How many lumens do I need for outdoor path lights?
Path lights perform best at roughly 100 lumens per fixture, spaced 6–8 feet apart. Security floodlights require 700–1,300 lumens to provide adequate area coverage.
Do I need a permit for outdoor lighting installation?
Low-voltage landscape lighting typically does not require a permit. Any line-voltage work, including hardwired wall sconces, new outdoor circuits, or permanent floodlights, requires a permit and inspection in most U.S. jurisdictions.