7 Proven Ways to Light Up Home Exteriors in 2026
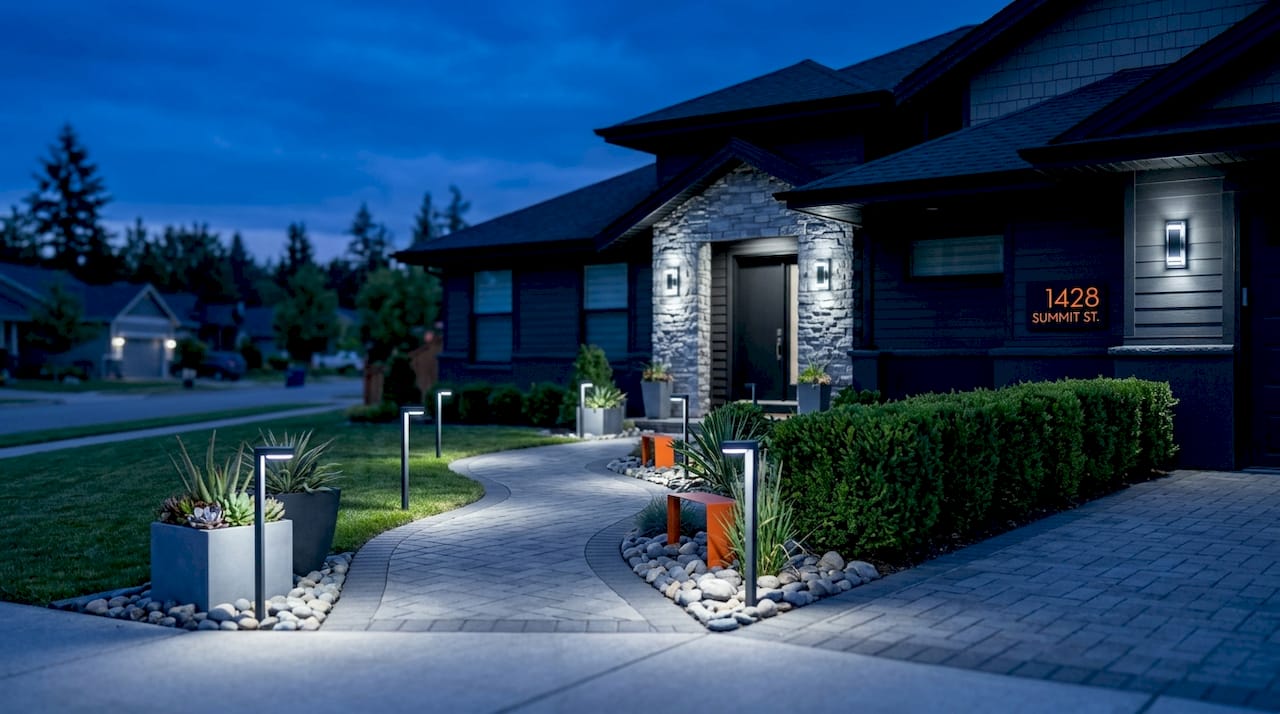
Exterior home lighting is defined as a layered system of fixtures designed to improve safety, curb appeal, and usability around your property after dark. The best ways to light up home exteriors combine path lights, wall sconces, uplighting, and smart controls into one cohesive plan rather than scattering random fixtures across the yard. When these elements work together, your home looks polished at night, your walkways stay safe, and your outdoor spaces become genuinely usable after sunset. This guide covers every major technique, compares your options by cost and complexity, and gives you placement rules that actually work.
1. Essential ways to light up home exteriors with the right fixtures
Every effective outdoor lighting plan starts with understanding what each fixture type does and where it belongs. Mixing the right fixtures is what separates a well-lit home from one that just has lights.
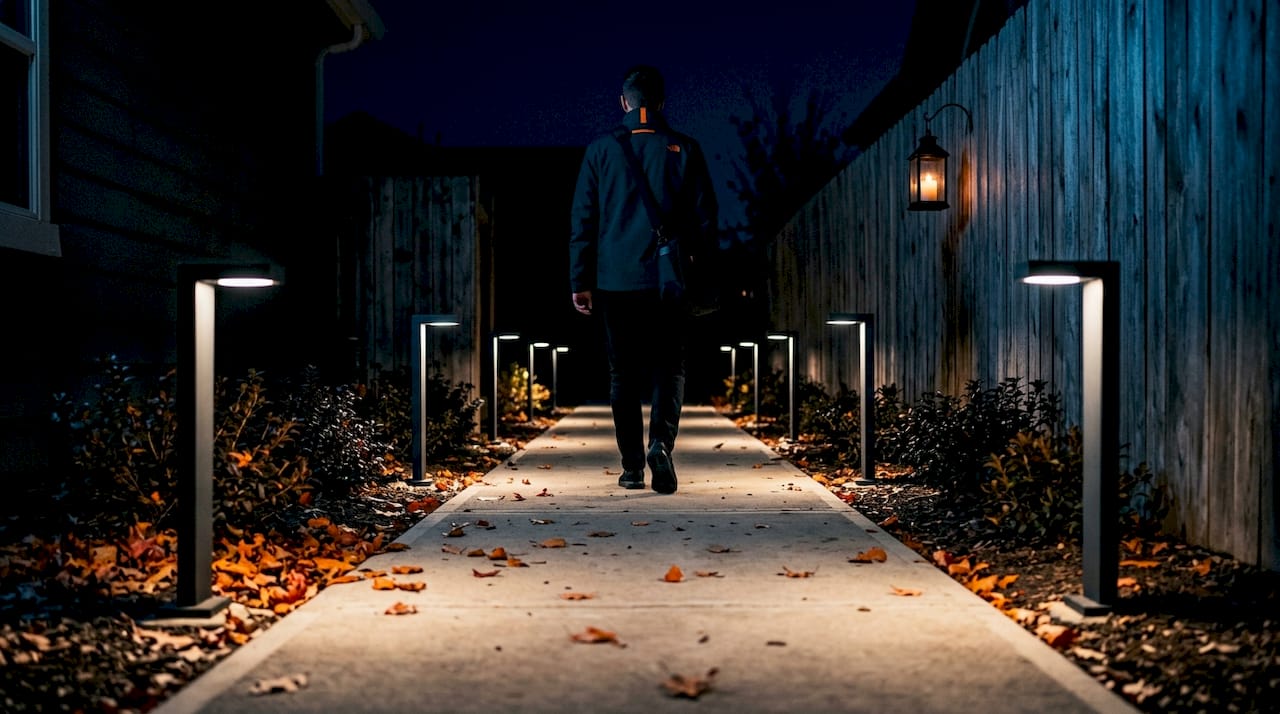
Path lights are the foundation of any safe exterior lighting plan. Standard path lights should be spaced every 6 to 10 feet and stand 12 to 24 inches tall to prevent trip hazards and guide visitors safely. That spacing creates a rhythm of light without turning your walkway into a runway.
Wall sconces anchor your entry points and signal where the front door is from the street. Exterior wall sconces should be mounted at roughly one quarter to one third the height of your front door for visual balance. A door that stands 8 feet tall calls for sconces centered around 24 to 32 inches above the ground.
Uplighting and spotlights direct a beam upward to highlight trees, columns, or architectural details. They add drama and depth to a flat facade without requiring complex wiring.
String and hanging lights serve a different purpose entirely. They create warmth and atmosphere for patios and decks, making outdoor entertaining feel intentional rather than accidental. JellyFish Lighting’s permanent patio systems, for example, eliminate the seasonal hassle of hanging and removing temporary strands.
Security lighting rounds out the system. Motion-activated flood lights and dusk-to-dawn fixtures near garages and side gates deter intruders and light up blind spots automatically. Pair these with your decorative fixtures so the security layer blends into the overall design.
Pro Tip: Choose 2700K warm white bulbs for path lights and sconces. That color temperature reads as welcoming and residential rather than the harsh blue-white of commercial parking lots.
2. How to layer lighting for curb appeal and outdoor living
Outdoor lighting works best as a complete, integrated system rather than a collection of individual fixtures. Layering means combining ambient, task, and accent lighting so each zone of your yard serves a clear purpose at night.
Uplighting is the fastest way to add visual depth. Positioning a low-voltage spotlight at the base of a mature oak or a stone column throws texture upward and creates contrast against the night sky. The same technique works on brick facades, drawing out the natural grain of the material.
Downlighting, sometimes called moonlighting, produces the opposite effect. Fixtures mounted high in trees or on tall posts cast a soft, diffused glow downward that mimics natural moonlight. This approach works especially well over dining areas and fire pit seating because it feels organic rather than staged.
Decorative fixtures like lanterns, pendant lights, and outdoor chandeliers add personality to covered porches and pergolas. Creative fixtures like hanging lanterns and fire features transform the atmosphere beyond what functional safety lighting alone can achieve. They signal to guests that the outdoor space was designed with intention.
Avoid shining light directly toward eye level. Effective outdoor lighting illuminates surfaces, paths, walls, and trees rather than the light source itself. Fixtures that blind visitors at the entry create a poor first impression and a safety hazard.
Smart lighting controls tie the layers together. Systems like JellyFish Lighting allow you to schedule zones, adjust brightness, and change colors from a smartphone app. That level of control means your security floods can run at full brightness while your patio string lights dim to 40% during a dinner party, all from one interface.
3. Comparing lighting options by energy source, cost, and application
Choosing between solar, low-voltage, and line-voltage systems comes down to three factors: where you need light, how bright it needs to be, and how much installation work you want to take on.
| System type | Power source | Best application | Installation complexity | Relative cost |
|---|---|---|---|---|
| Solar | Sun-charged battery | Path lights, accent markers | DIY-friendly, no wiring | Low upfront, variable output |
| Low-voltage (12V/24V) | Transformer + wire run | Path, landscape, uplighting | Moderate DIY | Moderate, consistent output |
| Line-voltage (120V) | Standard household current | Flood lights, wall sconces | Licensed electrician required | Higher, maximum brightness |
| Smart LED systems | Low-voltage or line-voltage | Full-property integration | Professional recommended | Premium, highest control |
Solar lights carry the lowest upfront cost and require no trenching or wiring, but their output depends entirely on how much sun the fixture receives during the day. In shaded yards or during cloudy stretches, solar path lights often dim noticeably by midnight.
Low-voltage systems running at 12V or 24V are the most common choice for DIY landscape installs. They are safer to work with, often exempt from conduit burial requirements, and can power a full yard of path lights and uplights from a single transformer. The key is planning your transformer capacity before you buy fixtures. Undersizing the transformer causes flickering and shortened bulb life.
Line-voltage systems at 120V deliver the most brightness and are required for high-output security floods and most wall sconces. These must be installed by a licensed electrician in most jurisdictions, which adds labor cost but also adds reliability.
Smart outdoor lighting systems allow remote control, scheduling, and integration with security devices, balancing convenience and energy efficiency. For homeowners in the Dallas-Fort Worth area managing large properties, that level of automation pays for itself quickly in reduced energy waste.
Pro Tip: If you are planning a full exterior lighting overhaul, start with a lighting layout guide before purchasing any fixtures. Mapping zones first prevents costly over-buying and reveals where you actually need line-voltage power versus where solar will do the job.
4. Placement guidelines that maximize safety and visual impact
Getting placement right matters as much as choosing the right fixtures. A well-chosen fixture in the wrong location creates glare, dead zones, or an unbalanced look that undermines the whole design.
Follow these placement rules for consistent results:
- Path lights: Space them every 6 to 10 feet in an alternating pattern on both sides of the walkway. Staggering rather than mirroring creates a more natural look and covers the path more evenly.
- Wall sconces: Mount at one quarter to one third the door height. For a standard 8-foot door, that puts the center of the fixture at 24 to 32 inches above the threshold.
- Uplights: Position at the base of the target, angled between 30 and 45 degrees. Too steep and the light washes out; too shallow and it spills onto the lawn instead of the feature.
- Flood lights: Mount at least 9 feet high and angle downward to cover the target zone without shining into neighboring yards or windows.
- String lights: Hang with a slight catenary curve rather than pulled tight. The gentle sag looks intentional and distributes light more evenly across the space.
A balanced backyard lighting plan typically calls for 8 to 15 fixtures to achieve cohesive safety and aesthetics. That range gives you enough coverage without over-lighting, which is just as problematic as under-lighting.
Always select wet-rated fixtures for fully exposed areas and damp-rated fixtures for covered porches and soffits. Using the wrong rating is the most common cause of premature fixture failure in outdoor installations. Check the UL listing label before you buy.
For multi-zone setups, use a programmable transformer or a smart lighting controller to run different zones on independent schedules. Your front entry can stay lit all night while your backyard accent lights shut off at 11 PM, cutting energy use without sacrificing security.
5. Creative and affordable outdoor lighting ideas
You do not need a large budget to make a meaningful difference in how your home looks at night. Several of the most effective outdoor lighting ideas cost very little and require no professional installation.
- Solar string lights along a fence line or pergola cost under $30 for a 50-foot strand and charge automatically during the day. They work well as supplemental accent lighting rather than primary illumination.
- Battery-powered lanterns placed on steps, railings, or outdoor tables add warm pools of light exactly where you need them. Brands like Brightech and Maggift offer weather-resistant options with 8 to 12 hours of runtime per charge.
- Fire pits and torch lights create atmosphere that no electric fixture can fully replicate. A propane fire pit with surrounding seating becomes the natural focal point of a backyard gathering, and the flickering light adds movement that static fixtures lack.
- Under-deck and under-step lighting extends the usability of patios and decks after dark. Recessed LED strip lights under stair risers cost roughly $15 to $25 per linear foot installed and dramatically improve both safety and visual appeal.
- Portable LED spotlights on stakes let you experiment with uplighting positions before committing to a permanent install. Move them around over a few evenings to find the angles that best highlight your trees or facade before you trench any wire.
For homeowners who want a permanent solution without seasonal maintenance, JellyFish patio lighting systems offer programmable color and brightness control built into a fixture that stays in place year-round. That eliminates the ladder work every November and April that temporary string lights demand.
Key takeaways
Effective exterior lighting requires a layered system of path lights, uplights, sconces, and smart controls placed at precise heights and intervals to serve both safety and aesthetics.
| Point | Details |
|---|---|
| Layer your lighting types | Combine path, accent, and security fixtures so each zone has a clear purpose. |
| Follow placement standards | Space path lights 6 to 10 feet apart and mount sconces at one quarter to one third door height. |
| Match fixtures to exposure | Use wet-rated fixtures outdoors and damp-rated under covered areas to prevent early failure. |
| Plan transformer capacity first | Size your low-voltage transformer before buying fixtures to avoid flickering and burnout. |
| Use smart controls for efficiency | Programmable systems let you run zones on independent schedules and cut energy waste. |
What I have learned after years of watching homeowners light their properties
The single biggest mistake I see is treating outdoor lighting as an afterthought. Homeowners finish a landscaping project or a new patio and then add a few fixtures at the end without any plan. The result is a yard that looks fine during the day and confusing at night, with bright spots next to dark voids and glare at eye level near the front door.
The homes that look genuinely impressive after dark all share one trait. Their lighting was designed before the first fixture was purchased. The owner, or a professional, walked the property at night, identified what needed to be seen, and built a fixture list from that assessment rather than from a display at a home improvement store.
I also think homeowners underestimate how much smart controls change the experience. Being able to dim your patio lights from your phone while sitting outside, or having your front entry lights automatically brighten when your security camera detects motion, makes the system feel alive rather than static. The technology is not expensive relative to the fixtures themselves, and it pays back in energy savings and convenience almost immediately.
One more thing worth saying plainly: glare ruins outdoor lighting. Hiding light sources behind landscaping or using fixtures with low-glare optics protects your night vision, keeps neighbors happy, and creates a far more welcoming atmosphere than bare bulbs pointed at eye level. The best lighting you will ever see is lighting you cannot quite locate. You see the effect, not the source.
— Adrian
Transform your home exterior with professional LED lighting
If you are ready to move beyond temporary fixes and build a lighting system that performs year after year, Dfwledpro installs permanent outdoor LED lighting systems across 35-plus cities in the Dallas-Fort Worth metroplex, including Arlington, Mansfield, Fort Worth, Grand Prairie, and Burleson.

Every installation starts with a custom layout assessment so your fixtures are placed for maximum visual impact and safety coverage, not just convenience. Dfwledpro is the official authorized JellyFish Lighting dealer for the DFW area, which means you get IP67-rated fixtures, a lifetime warranty, and smart app control built into every system. Whether you need permanent LED lights in Dallas or a full landscape lighting design in Fort Worth, our team handles everything from layout planning to final installation. Reach out today for a free consultation and see what a professionally designed system looks like on your property.
FAQ
What are the most effective ways to light up home exteriors?
The most effective approach combines path lights, wall sconces, uplighting, and motion-activated security floods into a single layered system. Each fixture type serves a distinct purpose, and together they cover safety, aesthetics, and security.
How far apart should outdoor path lights be spaced?
Path lights should be spaced every 6 to 10 feet and stand 12 to 24 inches tall. That spacing provides consistent illumination without creating harsh pools of light between fixtures.
What is the difference between wet-rated and damp-rated outdoor fixtures?
Wet-rated fixtures are built for fully exposed areas like open walkways and lawns, while damp-rated fixtures are designed for protected locations like covered porches. Using the wrong rating leads to premature failure and potential safety hazards.
Are solar lights good enough for home exterior lighting?
Solar lights work well as supplemental accent or path markers, but their output drops in shaded yards or during cloudy weather. For primary security and entry lighting, low-voltage or line-voltage LED systems deliver more consistent brightness.
How many outdoor lights does a typical backyard need?
A standard backyard lighting plan calls for 8 to 15 fixtures to achieve balanced safety and visual appeal. The exact count depends on yard size, the number of features you want to highlight, and how many distinct zones you are lighting.